
Can Aluminum Be Welded?
- Yongxing
- 03 Apr ,2026
Aluminum looks simple, but many buyers and engineers find welding it risky, costly, and easy to get wrong.
Yes, aluminum can be welded well with the right process, clean surface, correct filler, and tight heat control. Good welding depends more on method and preparation than on luck.
Many people see aluminum as a light and useful metal, but they also hear stories about burn-through, weak joints, and ugly weld beads. That fear is real. Still, once the basics are clear, aluminum welding stops being a mystery and becomes a process that can be controlled.
What Welding Methods Work for Aluminum?
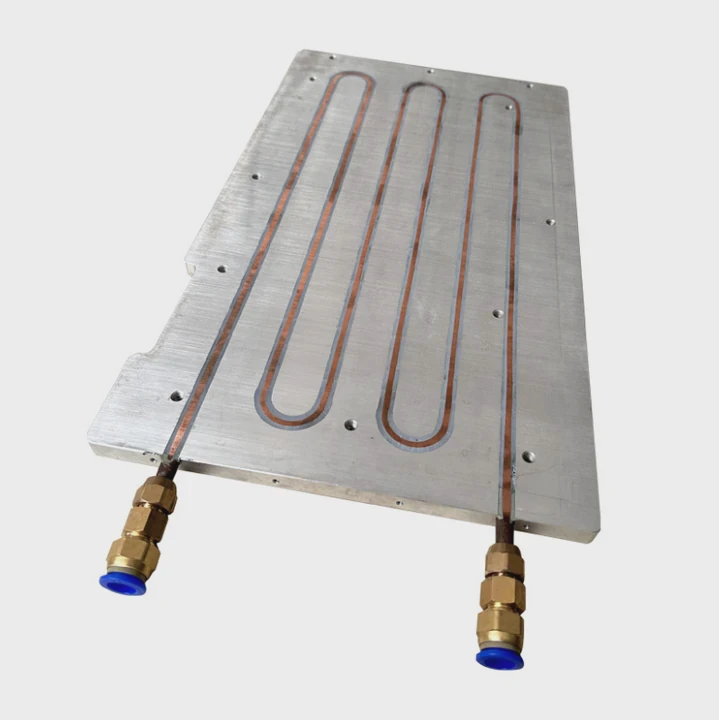
Aluminum can be welded by TIG, MIG, laser welding, friction stir welding, and some resistance methods. In most real jobs, TIG works best for precision, while MIG works best for speed and thicker parts. The right choice depends on part shape, thickness, strength needs, and production volume.
Aluminum does not accept every welding method in the same way. That is the first thing I always make clear when this topic comes up. A method that works well for steel may fail on aluminum because aluminum moves heat fast, melts quickly, and forms a strong oxide layer on the surface. So the question is not only “Can it be welded?” The better question is “Which method fits the job?”
Common aluminum welding methods
The most common methods are TIG and MIG. TIG welding gives better control. It is often used for thin sections, prototype parts, visible welds, and jobs that need a clean finish. MIG welding is faster. It is often used for medium and thick aluminum parts, long weld seams, and batch production.
Laser welding also works for aluminum, especially in advanced manufacturing. It offers narrow heat input and high speed. But it needs tight process control and precise fit-up. Friction stir welding is another strong option. It is not a fusion process. It joins the metal in a plastic state, which helps reduce some defects found in normal arc welding. This method is very useful for panels, rails, battery trays, and large structural parts.
Quick comparison table
| Method | Best use | Main strength | Main limit |
|---|---|---|---|
| TIG welding | Thin parts, precise work, visible seams | High control and clean weld appearance | Slower speed |
| MIG welding | Thicker parts, long seams, production runs | Fast and efficient | More spatter and less fine control |
| Laser welding | Precision industrial parts | Low heat input and high speed | High equipment cost |
| Friction stir welding | Panels and structural joints | Low distortion and good repeatability | Special machine needed |
How I look at method choice
In real factory work, method choice starts with four simple questions:
1. How thick is the aluminum?
Thin parts often need TIG because heat control matters more than speed. Thick sections often move toward MIG or other high-productivity methods.
2. How clean must the weld look?
For cosmetic parts, TIG usually wins. For hidden structural joints, MIG may offer better value.
3. How many parts need to be made?
One prototype and ten thousand production pieces should not use the same thinking. Volume changes everything.
4. What failure is most dangerous?
Some jobs care most about strength. Some care about leak-tightness. Some care about low distortion. The method should match the real risk.
A lot of welding trouble starts when people choose a process for convenience, not for fit. A shop may own MIG equipment and try to run every aluminum job through it. Another team may prefer TIG because the welders know it well, even when production speed becomes too slow. That habit creates waste. Good aluminum welding is less about forcing one process to do everything and more about matching the process to the part. When that happens, weld quality improves, rework drops, and the joint becomes far more stable in service.
Is Aluminum Difficult to Weld?
Aluminum is harder to weld than mild steel for many people because it melts fast, spreads heat fast, and carries an oxide layer that melts at a much higher temperature than the base metal. Still, it is not too difficult when the process, fit-up, and cleaning are handled in the right way.
Many people call aluminum “difficult,” and I understand why. It reacts in ways that surprise new welders. The puddle can collapse fast. Distortion can show up early. Porosity can appear even when the weld looks fine from the outside. Yet “difficult” does not mean “unreliable.” It only means the margin for error is smaller.
Why aluminum feels harder than steel
The first problem is heat flow. Aluminum conducts heat much faster than steel. Heat runs away from the arc, so the welder often needs more initial energy to start the puddle. Then the metal suddenly gets hot enough and begins to melt very quickly. This change can catch people off guard.
The second problem is the oxide layer. Aluminum oxide forms naturally and covers the surface. That oxide melts at a much higher temperature than the aluminum below it. A part may look solid on the surface while the base metal underneath is already close to melting. That creates poor fusion or sudden burn-through.
The third problem is contamination. Aluminum reacts badly to oil, moisture, dirt, and trapped hydrogen. Even small surface issues can lead to porosity or weak welds.
What makes aluminum manageable
Aluminum becomes much easier when the work is broken into simple controls.
| Challenge | What causes it | Simple control |
|---|---|---|
| Burn-through | Fast melting and poor heat control | Use correct current and travel speed |
| Porosity | Moisture, oil, dirty filler, poor gas coverage | Clean parts and protect shielding gas |
| Lack of fusion | Oxide layer and poor joint prep | Remove oxide and prepare edges well |
| Distortion | High thermal expansion | Use fixtures and balanced weld sequence |
Skill matters, but system matters more
This is where many people get the wrong idea. They think aluminum welding depends only on the welder’s hand skill. Hand skill matters, of course. But the system around the welder matters just as much. Bad wire storage, poor fixture design, weak gas coverage, loose fit-up, and unclean parts can ruin the result before the arc even starts.
That is why some shops say aluminum is always difficult, while other shops treat it as a normal daily process. The difference is not magic. The difference is control. When I review aluminum weld failures, the root cause is often not the welding step alone. It is usually a chain of small mistakes: the wrong filler, no edge prep, poor clamping, dirty material, and rushed settings. Each issue looks minor. Together, they create a bad joint.
So yes, aluminum is less forgiving than steel. But it is not beyond control. A trained team with a clean process can weld aluminum with stable quality. Once people understand how aluminum behaves, the fear starts to fade, and process discipline takes over.
What Preparation Needed Before Welding Aluminum?
Before welding aluminum, the part needs full cleaning, oxide removal, correct fit-up, filler selection, parameter setup, and stable fixturing. Good preparation prevents many common problems such as porosity, weak fusion, distortion, and rework.
Preparation is where aluminum welding is often won or lost. Many weld defects do not begin during welding. They begin earlier, when the material is stored badly, cut poorly, touched with oily gloves, or fitted with gaps that are too large. In practice, preparation is not a side step. It is part of the welding process itself.
Clean the surface the right way
The first step is surface cleaning. Aluminum must be free from oil, grease, moisture, paint, and dust. A clean cloth and the right solvent are often used first. After that, the oxide layer should be removed with a dedicated stainless steel brush or another approved cleaning method. That brush should be used only for aluminum. If it has touched steel, it can transfer contamination.
Prepare the joint edges
Joint design matters a lot. Thin parts may need little edge work, but thicker parts often need beveling so the weld can reach full penetration. Gaps should be controlled. If the fit-up is too loose, the puddle becomes harder to manage, and burn-through risk goes up.
Match the filler and base material
Not all filler wire works the same way. Filler choice affects crack resistance, fluidity, appearance, and final strength. This choice should match both the alloy and the service need of the part. A poor filler match can create defects even when the weld bead looks smooth.
Checklist before welding
| Preparation step | Why it matters | What to check |
|---|---|---|
| Remove oil and grease | Stops porosity and contamination | Surface is dry and clean |
| Remove oxide layer | Helps fusion and arc stability | Fresh cleaned weld zone |
| Check fit-up and gap | Controls weld pool and penetration | Joint gap is consistent |
| Select filler wire | Supports strength and crack control | Filler matches alloy and use |
| Set fixture and clamps | Reduces movement and distortion | Part stays stable during welding |
| Protect filler storage | Prevents dirt and moisture pickup | Wire is dry and covered |
Small details that change the result
A point that deserves more attention is timing. Cleaned aluminum should not sit too long before welding. The surface oxide begins to form again very quickly. In a busy shop, parts may be cleaned, set aside, and welded much later. That habit weakens the value of the cleaning step.
Another key issue is tool separation. Aluminum prep tools should stay separate from steel tools. Shared grinding discs, brushes, or worktables can introduce contamination that becomes a hidden source of defects.
Fit-up is not a minor issue
Poor fit-up causes more trouble than many people expect. If parts do not meet evenly, the welder must correct the joint with filler and heat. That adds inconsistency. On repeat jobs, this leads to unstable quality from piece to piece. Tight dimensional control makes welding easier, faster, and more repeatable.
I often think of preparation as risk removal. Each prep step removes one cause of failure. Cleaning removes contamination risk. Oxide removal removes fusion risk. Good fit-up removes pool control risk. Correct filler removes compatibility risk. Fixturing removes movement risk. When these risks are removed early, welding becomes simpler and more predictable. That is why strong teams do not rush through preparation. They treat it as a core production step, not as extra work.
How to Avoid Cracks When Welding Aluminum?
To avoid cracks in aluminum welding, use the right filler alloy, control heat input, reduce joint stress, improve fit-up, clean the base metal, and follow a balanced weld sequence. Cracks usually come from a mix of material sensitivity, shrinkage stress, and poor process control.
Cracking is one of the most serious aluminum welding problems because it can destroy joint strength even when the weld bead looks acceptable from the outside. In many cases, the crack starts during solidification as the weld cools. Aluminum shrinks, stress builds, and a weak metallurgical condition opens the path for failure.
Why cracks happen
The root cause is rarely just one thing. Cracking usually comes from the overlap of alloy behavior, weld design, restraint, and thermal stress. Some aluminum alloys are more crack-sensitive than others. Some filler metals improve crack resistance, while others raise the risk if they are used on the wrong base alloy.
Excessive restraint is another major cause. When the part cannot move during cooling, shrinkage stress collects in the joint. The weld then becomes the weak point. Joint shape also matters. Sharp transitions, poor root design, and uneven weld sections can concentrate stress.
Main ways to reduce cracking
Use the correct filler metal
Filler selection is one of the strongest tools against cracking. The right filler changes how the weld metal solidifies and can lower crack sensitivity.
Control heat, but do not underweld
Too much heat can enlarge the heat-affected zone and increase distortion. Too little heat can create lack of fusion and unstable solidification. Balance matters more than extremes.
Improve joint design
Smooth transitions, proper root opening, and correct groove design help the weld cool in a more even way.
Reduce restraint
Fixtures should hold the part, but they should not lock it so hard that shrinkage has nowhere to go.
Use a planned weld sequence
Balanced welding from one side to another, or in a controlled sequence, helps spread heat and stress more evenly.
Practical crack prevention guide
| Risk factor | Effect on weld | Prevention step |
|---|---|---|
| Wrong filler alloy | Higher crack sensitivity | Choose filler for alloy compatibility |
| High restraint | Shrinkage stress builds up | Use fixtures that support but do not over-lock |
| Poor joint geometry | Stress concentration | Improve groove and transition design |
| Dirty base metal | Unstable weld quality | Clean surface and remove oxide |
| Excessive heat input | Large thermal stress and distortion | Use controlled parameters and travel speed |
| Uneven welding sequence | Local stress buildup | Apply a balanced weld plan |
Cracks often start before the arc
That idea is very important. Many people try to solve cracks only by changing current or wire feed speed. Sometimes that helps, but many cracks are born earlier in the design and setup stage. A crack-sensitive alloy, a bad filler choice, and an over-restrained fixture can create failure even when the welder performs well.
Look at the whole joint system
When a crack appears, the smart response is not to blame one variable too fast. The full system should be reviewed: base alloy, filler, prep, gap, fixture, sequence, and cooling condition. In production, stable crack prevention comes from repeatable control, not from trial and error on the shop floor.
I have seen many cases where a small change made a big difference. A new filler wire reduced hot cracking. A better tack weld plan improved alignment and lowered restraint. A simpler groove shape improved fusion and reduced local stress. These are not dramatic changes, but they work because cracking is usually a system problem. Once the joint is treated as a system, prevention becomes much more realistic. That is the main lesson: crack control is not a single trick. It is a chain of good choices made before, during, and after welding.
Conclusion
Aluminum can be welded well. The key is simple: choose the right method, prepare the joint carefully, control heat, and reduce crack risk with the right filler and fit-up. When the process stays disciplined, aluminum welding becomes reliable.


